
My husband, Trenton and I were given the keys to our new home at the beginning of June 2014. Through the weirdest and most wonderful twist of fate, our new home ended up being the house my sister Heather and brother-in-law, Tim built when Trenton and I had just started dating. I actually lived in the house during our entire courtship. I did my hair on my wedding day in that house. My bridal shower and a couple of my baby showers were held there. I spent a good majority of my pregnancies on my sister's couch while she took care of me during the worst of my morning sickness, and we enjoyed so many Halloween nights and Christmas mornings in the home. When my brother-in-law ended up taking a job in Kansas, the opportunity presented itself for us to make that house our home. The first time I stepped in the empty house on the day we got the keys, I was filled with such a mix of emotions. I was mostly ecstatic to have such a beautiful home. How wonderful to raise my family where so many memories thrive. But I was also immediately hit with sadness- The only reason we were moving into this house was because my sister was moving out of state.
It became clear to us that it was time to make this house our home...a place where we could make our own, new memories. We started thinking about little things we'd like to change and ways we could make the place feel more like ours. Before we knew it, we had plans in the works for an almost complete renovation. The home is in excellent condition, so everything we did was more for personal aesthetics. It's been over a year since we finished this transformation, and our fingers are still recovering from working them to the bloody bone.
This is what we started with. As I had mentioned earlier, the kitchen was in great shape, it was just time to update the look to our liking. The cabinets are solid oak, with raised panel doors. We removed all the doors and hinges, making sure to number them for reassembly. Since we don't have a finished basement, and the garage was being used for other projects, we set up a paint station in the basement. Thankfully, a good friend of ours loaned us his industrial paint sprayer, which helped us get the smoother finish without the worry of paintbrush streaks. It also cut our painting time down considerably.

Since we had already planned on replacing the flooring throughout the main level, we removed and rebuilt the island, and also removed the pony wall dividing the kitchen from the family room.


Before painting, we added custom touches, including bead-boarding, and toe molding underneath the upper cabinets. We also added crown molding above the upper cabinets to increase the height and aesthetic. Once this was done, we were finally ready for prepping and painting.


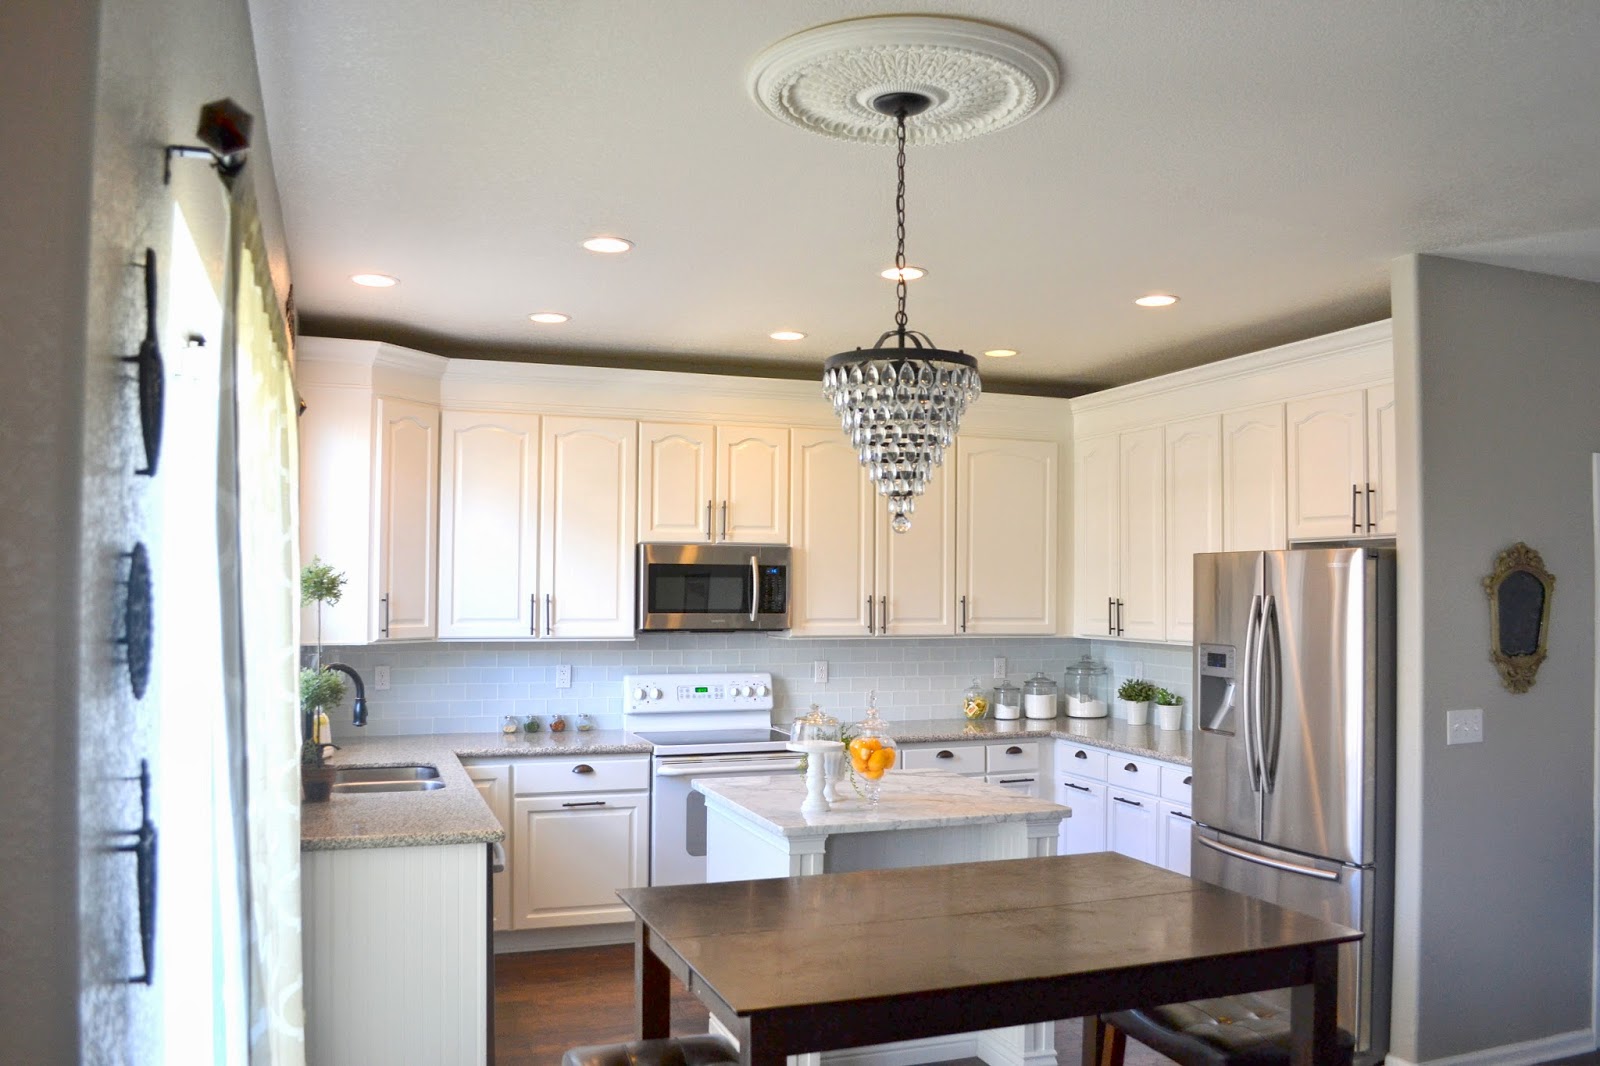
For flooring, we used Home Depot Saratoga Distressed Hickory.


Trenton built the island after flooring was laid. He used the existing cabinet, but extended it for a custom look and to support a larger counter. It took me months to track down the perfect piece of carrera marble to top the island. Miraculously, I found a remnant from a bathroom vanity that had all the beautiful veining I had been searching for.


I couldn't wait for the bulk of the project to be done so I could add my final little touches. We added new lighting and plumbing fixtures, a medallion above the chandelier (which I'm happy to report I found at a garage sale for $10), my favorite wall paint color (Benjamin Moore Revere Pewter), and oil-rubbed bronze hardware.


Janet Schlosser- forgetthefinishline.blogspot.com

No comments:
Post a Comment